Table of Contents
Preamble
This guide will walk you through the deployment of DirSync. This tool allows you to synchronize your on-premises Active Directory domain with Office 365. This, in turn, allows you to have a consistent, unified login experience across your workstations, local LDAP-bound services and (buzzword alert) the cloud, i.e. Office 365. This is an alternative to federation, which is a much more complicated scenario and which is, in many cases, either infeasible or undesirable.
The article assumes that you’re familiar with the general principles of Active Directory and that you already have Office 365 and an on-premises AD domain set up. I’ll cover the steps to
- create new Office 365 accounts via AD accounts
- link existing Office 365 accounts to AD accounts
- migrate Office 365 accounts to a new AD domain
I think that’s pretty much all you would ever wish to accomplish. So in short, this guide is intended as a definitive guide for all your DirSync-related tasks, based on our experiences in the last 6 months. Let’s start!
Office 365 Preparation
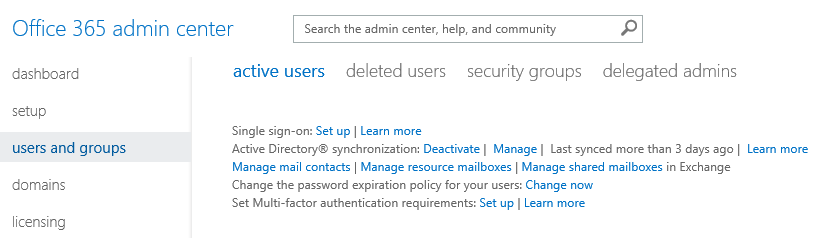
Go to the Office 365 Admin Center, click Users and Groups, find Active Directory® synchronization and click Activate. It could take a few hours to complete, but usually it’s done pretty quickly. In the meantime you can proceed to the next step.
Active Directory Preparation
It’s usually not a good idea to sync all users right away to Office 365, it’s very intrusive and adds a lot of noise to the Office 365 management portal. I’m pretty sure you don’t want to see your backup_helper and webserver_watchdog users in Office 365. To avoid this, create an Organizational Unit (OU) for the users you’d like to sync to Office 365, but don’t move any users there yet. This OU will allow for a controlled sync between AD and Office 365, otherwise you’d get lots of collisions or other unwanted side effects like the one mentioned above. It’s recommended that you create this OU right under the main OU for your users so that Group Policy will keep propagating correctly thanks to inheritance.
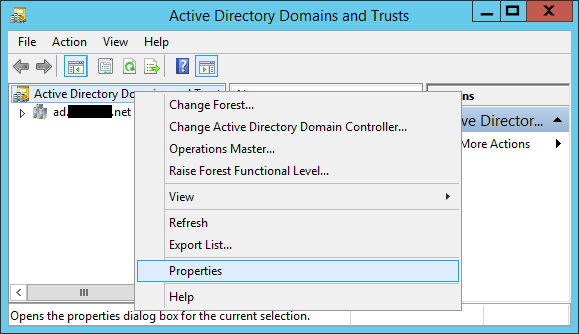
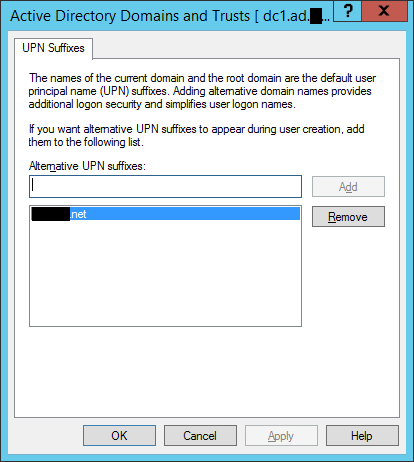
One more thing you want to do is to add a new UPN suffix to your domain. This suffix must match the email address domain in your Office 365 organization, i.e. if your accounts have email addresses like [email protected], then you gotta add the foo.bar UPN suffix. Go to Active Directory Domains and Trusts, right click on the top level node and go to Properties.
Enter the corresponding suffix, click Add, then click OK.
DirSync Preparation
This server will be responsible for syncing your accounts from time to time. Microsoft often refers to this as a Secure Token Service (STS), so I’ll also use the 2 terms interchangeably.
Installation
Install a new member server in your domain. A member server is Windows Server without directory services, i.e. it’s a server, but not a domain controller (DC). Initially DirSync only worked on member servers, but recently they’ve changed this and now it can be installed even on a DC. But it’s usually a bad idea to do so. If something goes wrong with a dedicated STS server (e.g. it stops syncing for any reason) and you end up reinstalling the whole thing, you can do so anytime. If it’s on a DC, well, then you’re screwed. Yes, you can replace that, too, but it’s much more of an effort. Sometimes STS just needs a restart, and then again, it’s much more painful if it’s a DC. So unless you’re really limited to your DCs, you do want a separate, dedicated server for DirSync.
Once you’re finished with the initial installation, make sure to install .Net Framework 3.5 SP1 and 4.0 as well. Also make sure to install all updates via Windows Update.
Once Office 365 finishes activating the sync, you can click on the Manage button.
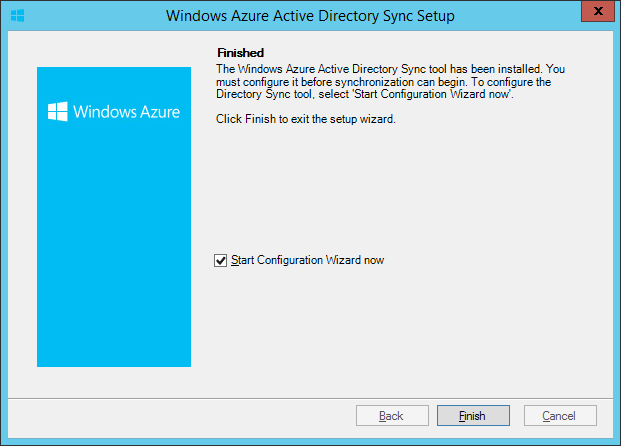
There you’ll find the Install and configure the Directory Sync tool section. Download the util, then install it. It’s a typical next-next-finish experience. When it finishes, make sure that the Start Configuration Wizard now option is checked and click Finish.
Configuration
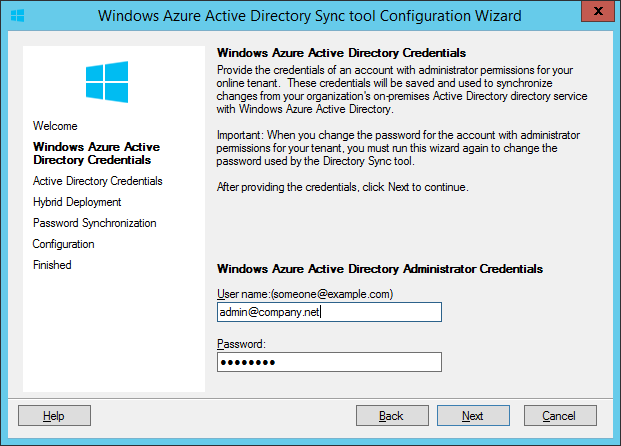
You’ll be presented with a welcome screen, and then it asks for the credentials of an Office 365 admin. This account will be used for syncing, i.e. creating Office 365 objects, updating account passwords and other attributes. You can create a dedicated account just for this, but it’s not necessary.
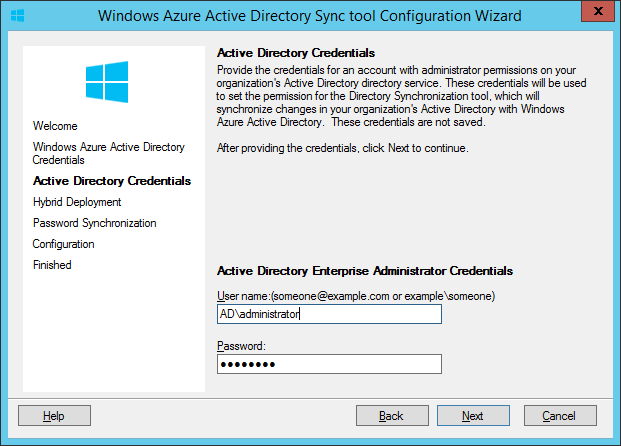
Next, you gotta specify an administrator account for your local domain (I think it has to be an enterprise admin but FIXME). You can safely enter it, it won’t be saved, it’s only used for creating a helper account that will be doing the job later.
Next you can enable Hybrid Deployment if you wish. By default, DirSync is a one-way sync from AD to Office 365, but Hybrid Deployment enables a 2-way sync. We never used it because the attributes it can sync back to the on-premises domain are pretty worthless. Maybe it will improve over time.
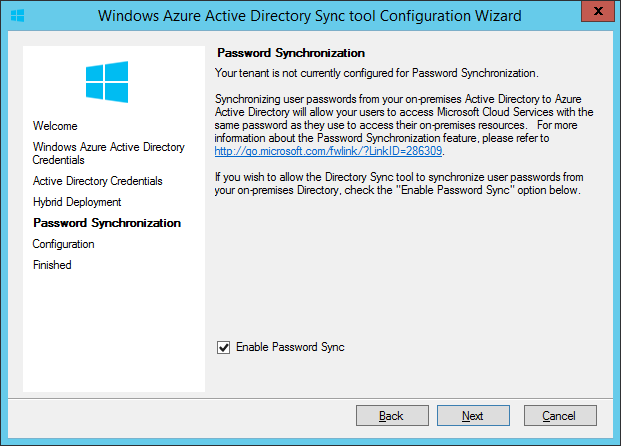
Next stuff is the real deal, Password Synchronization. You want this, I’m sure 😉
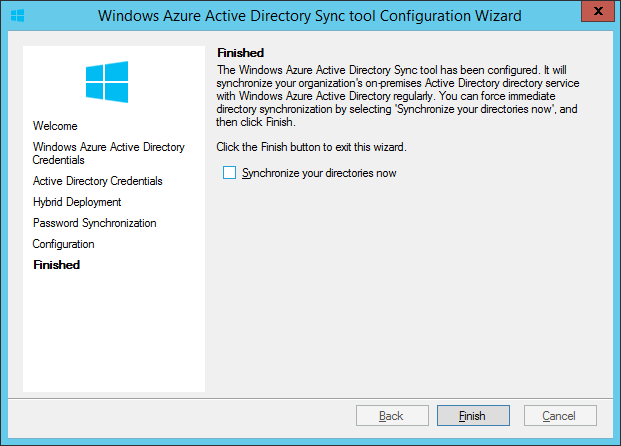
And now it’s time to pay attention. Really. You just need to uncheck Synchronize your directories now. You don’t want 50 new users in Office 365, do you?
Once it’s done, right away switch to your DC. Go to the Users OU and find the account starting with MSOL_.
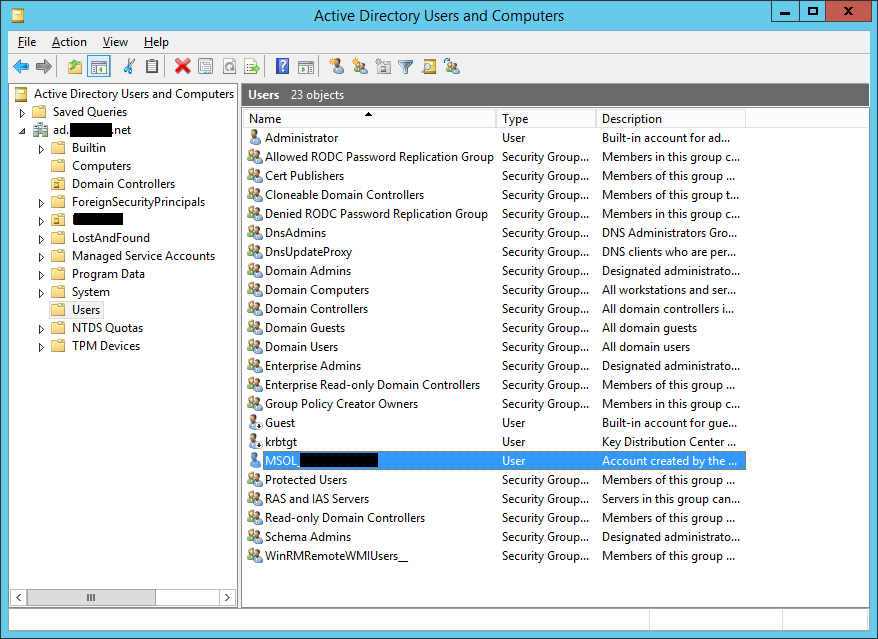
This is the account the DirSync installer created. Generate a strong password for this account, take note of it somewhere because you’ll need it later (KeePass FTW), then reset the account’s password with this one. At this point DirSync is unable to perform syncs because it tries to use its own generated password which won’t work anymore. Yet.
Now back to the STS, go to %PROGRAMFILES%\Windows Azure Active Directory Sync\SYNCBUS\Synchronization Service\UIShell and start miisclient.exe. This is the Synchronization Service Manager (SSM) which I’m sure you’ll use very often so it’s a good idea to create a shortcut for it on the Desktop. Now, it’s most likely that you’ll get a nice error about services not starting and stuff.
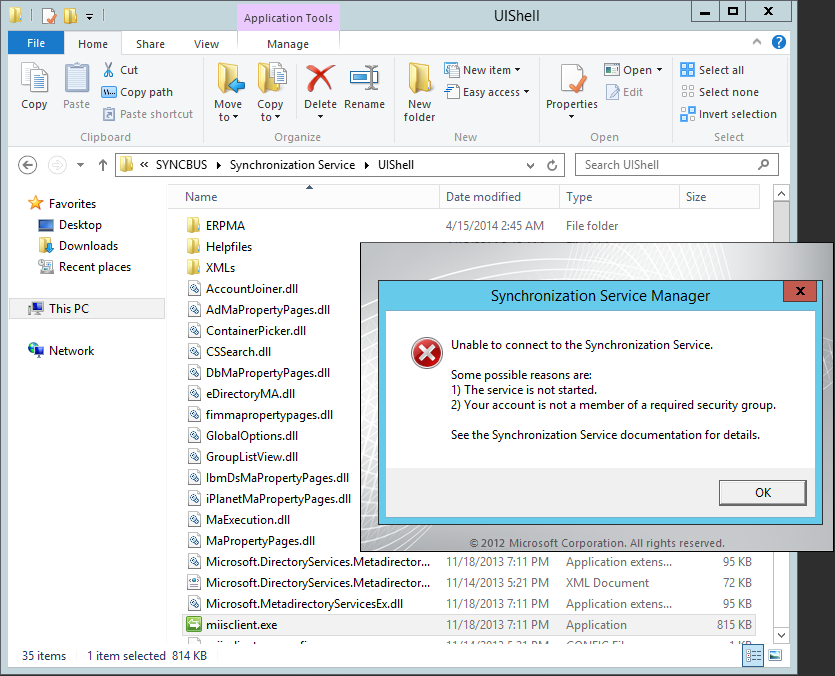
So it’s the best to just restart the server and it’ll work fine after that. See? I told you, you want a dedicated STS server 😉
Next time, when SSM actually starts up, go to Management Agents.
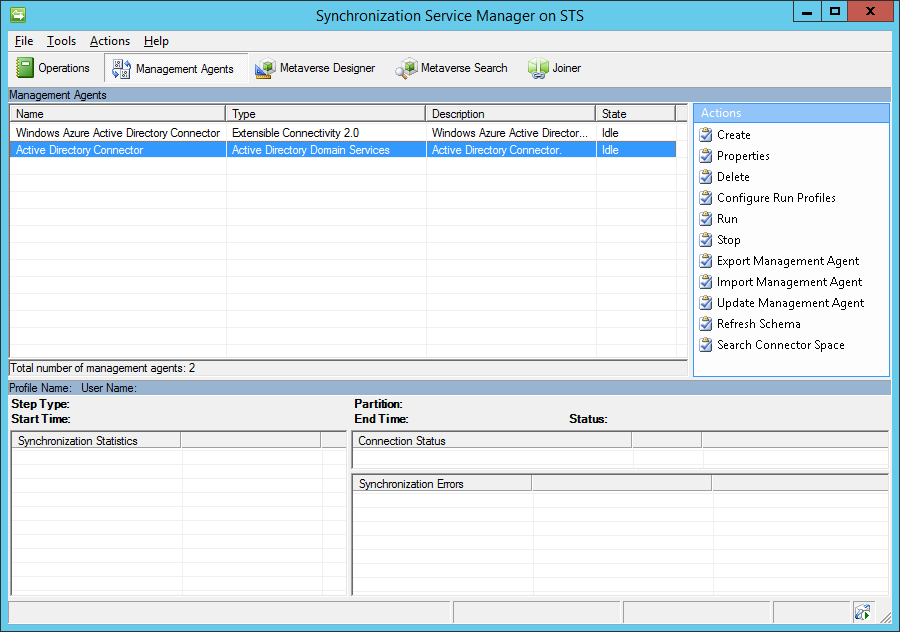
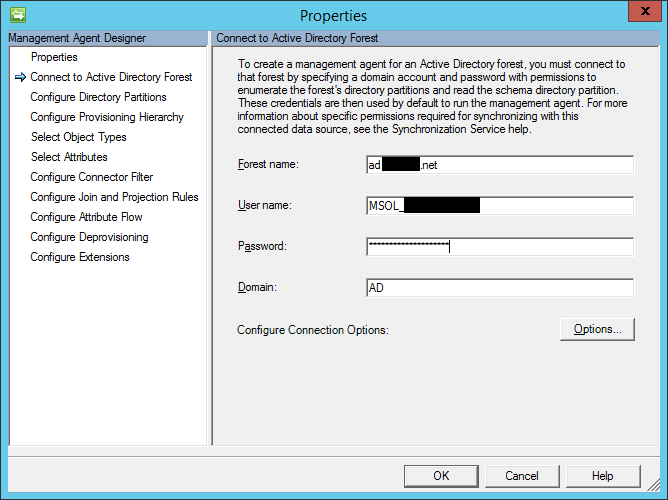
Double-click on Active Directory Connector, then go to Configure Directory Partitions.
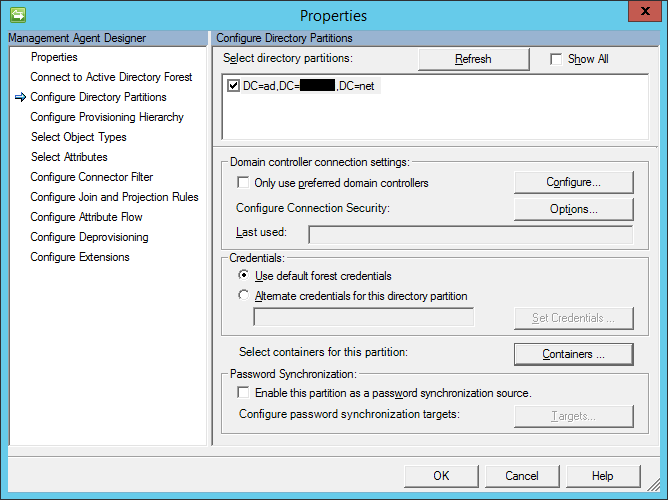
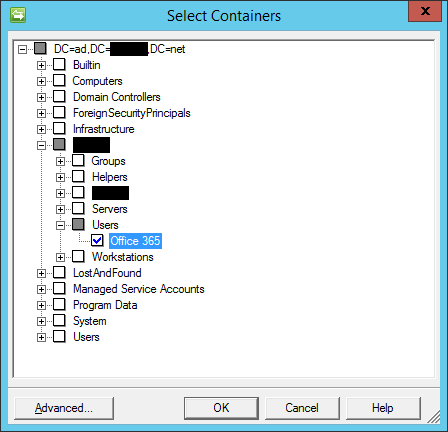
Now click on Containers… where you have to specify the password you generated a few minutes ago.
And finally, now you can limit the scope of directory synchronization. Specify the OU(s) which you want to be synced to Office 365 and press OK.
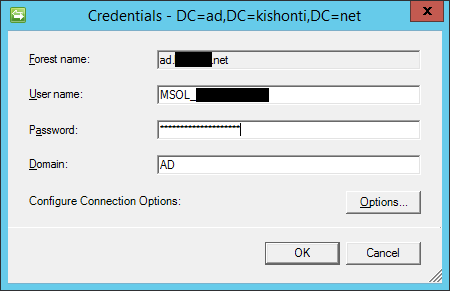
Lastly, go to Connect to Active Directory Forest and update the MSOL password once again.
Sync
Basics
First you want to sync your… nothing. Once the nothing syncs correctly (LOL), you can proceed to sync actual users. Remember, you’ve created an empty OU, then set up OU level filtering so that it will only sync accounts from this OU. Let’s try to sync it now.
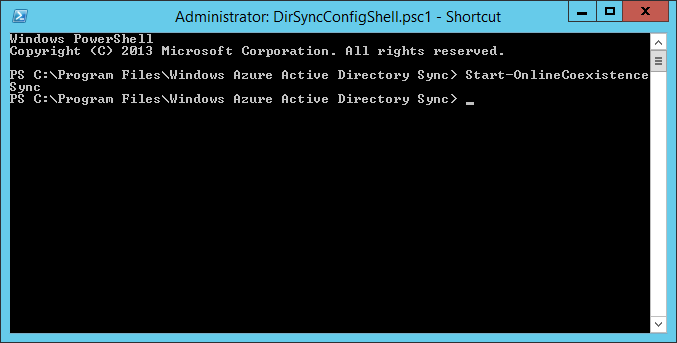
Go to %PROGRAMFILES%\Windows Azure Active Directory Sync and start DirSyncConfigShell.psc1 (yes, you want a shortcut for this, too). Once it starts up, force the sync manually with the Start-OnlineCoexistenceSync command.
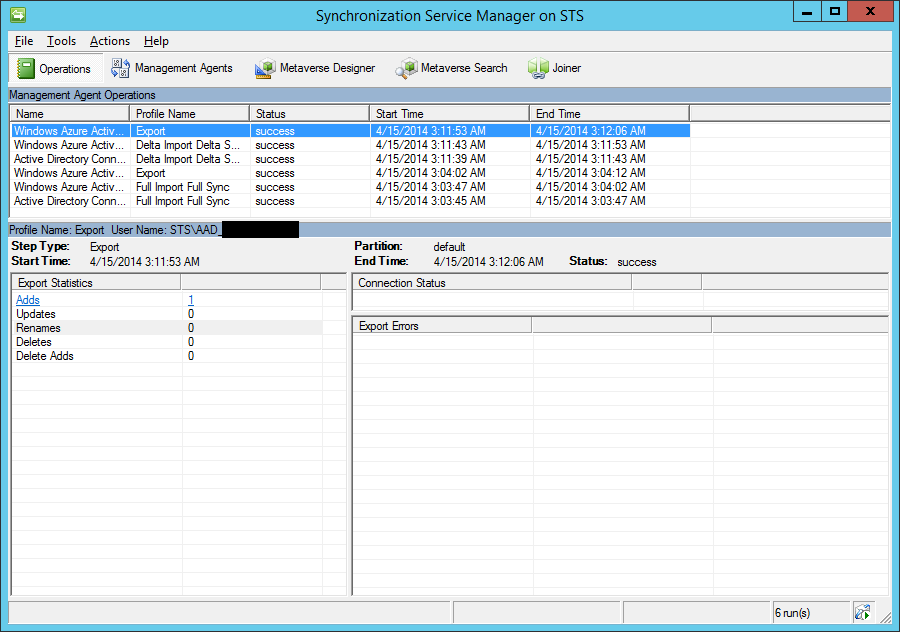
Now open SSM and you can track the process. At first it scans all your AD objects:
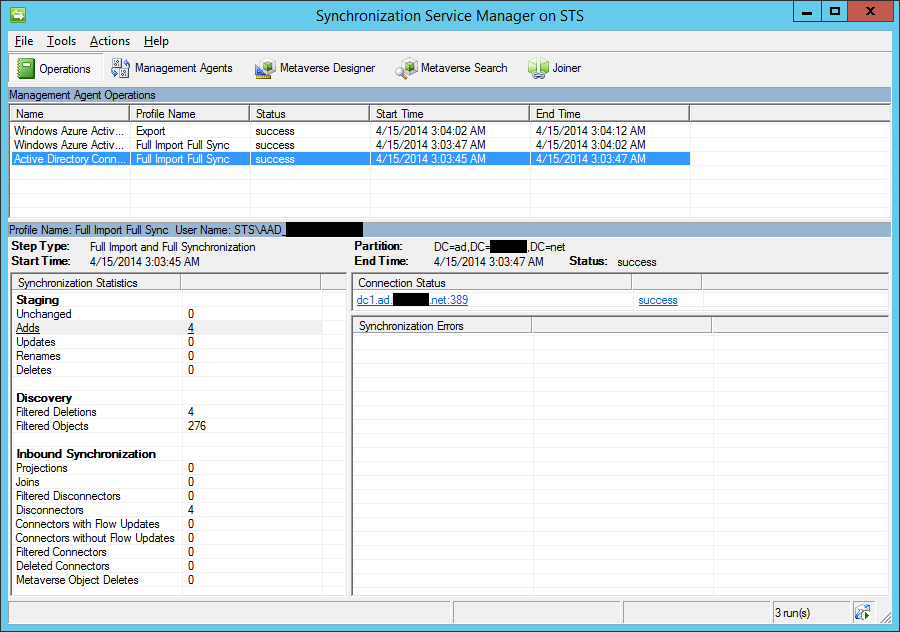
Then it figures there’s some users it could sync:
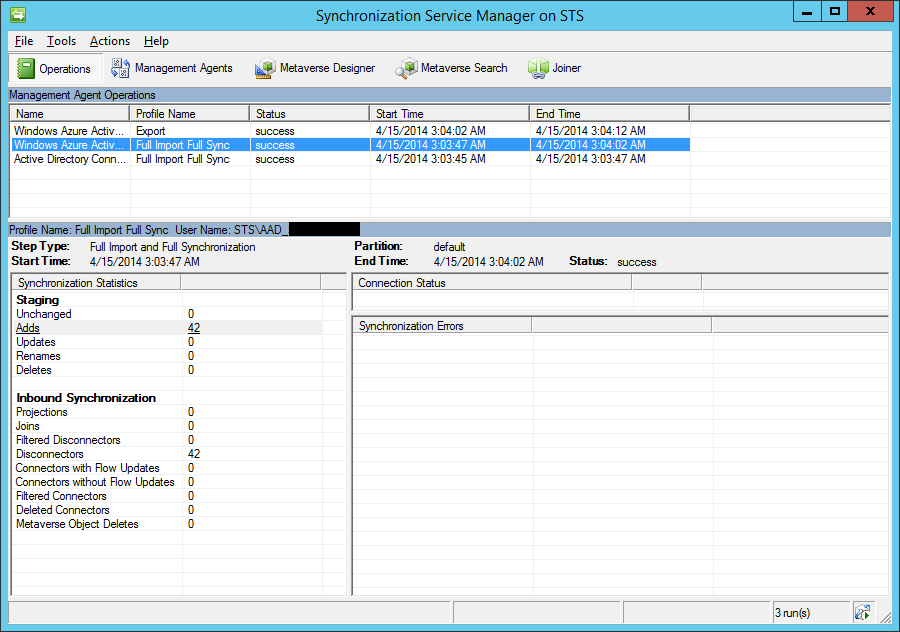
But then it syncs none of them thanks to the limited scope:
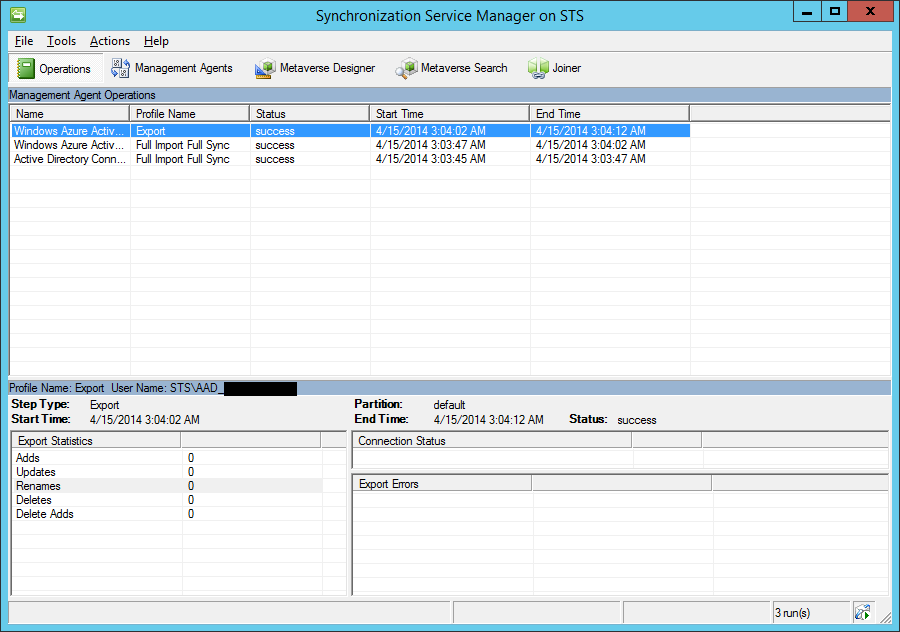
So at this point you can conclude that DirSync is working fine.
Creating Office 365 accounts via AD
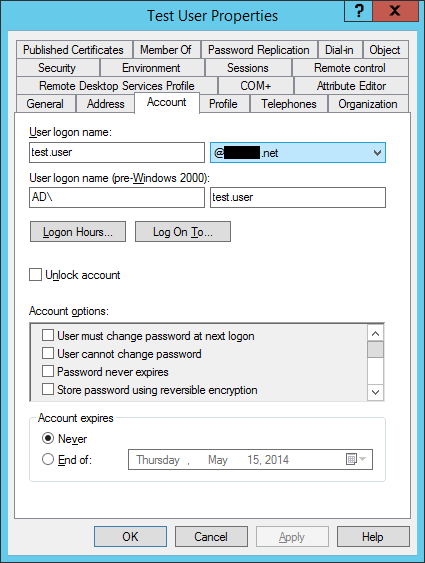
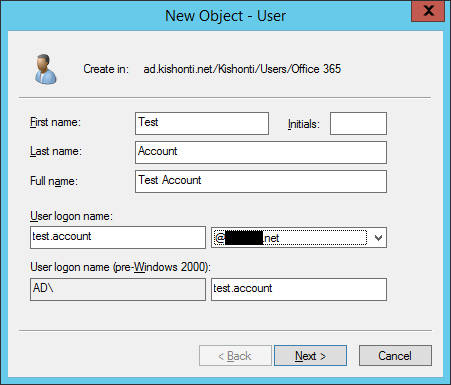
I know you enjoyed syncing the nothing, but fortunately there’s more to come. Create a new user under the OU you just created, but make sure to change its UPN suffix to the one you created earlier.
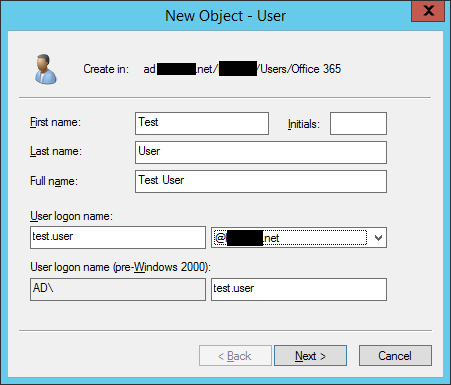
If you forgot to do that, you can change it later in account properties, too.
Now force a sync with Start-OnlineCoexistenceSync. It should say that it added a new user.
If you click on Adds, it will show the IDs of the objects that have been added.
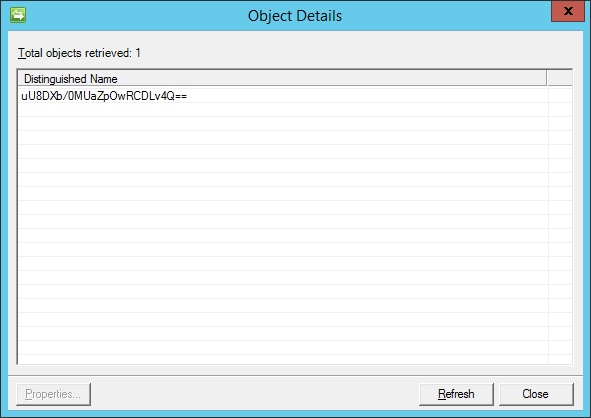
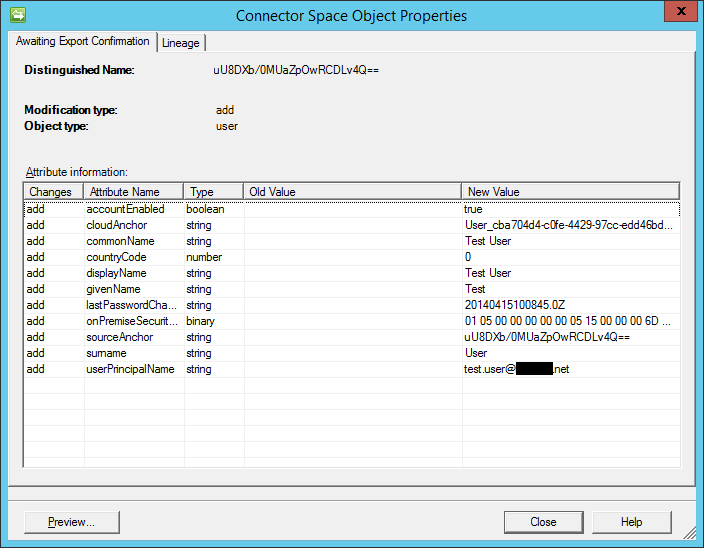
Double-click on the ID and it shows you the details. There you go, the account you just created in AD.
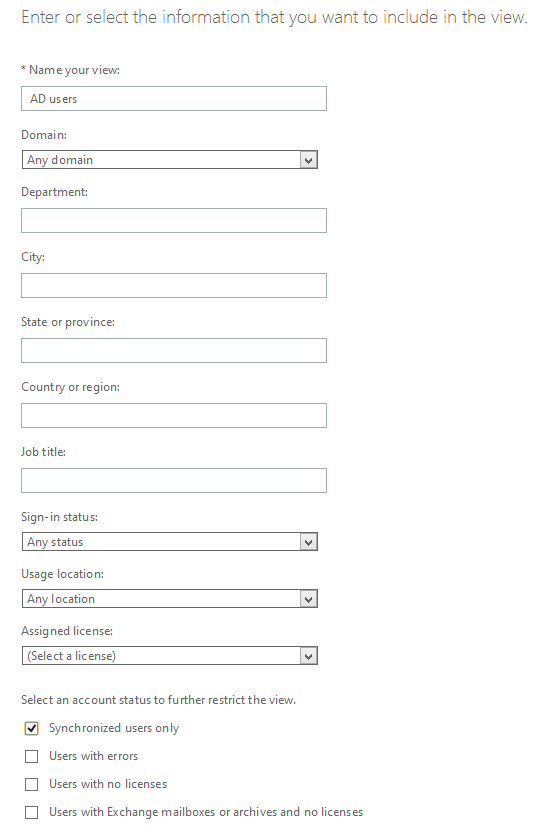
Now it’s probably a good idea to create a new view in the Office 365 portal.
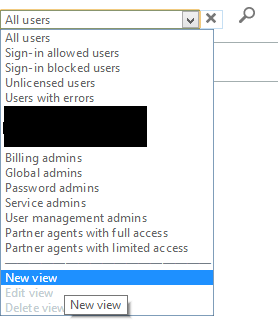
Give it a name, then check Synchronized users only. That’s it.
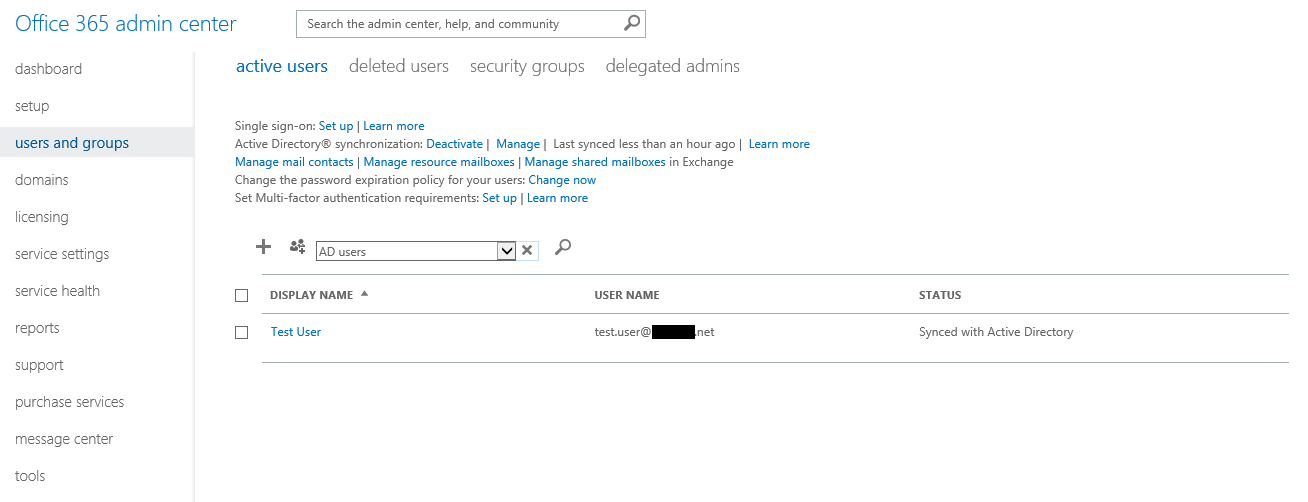
Now select this new view, and voila, now you can easily view the users that have been synced so far. Note the Synced with Active Directory status.
Linking existing Office 365 accounts to AD accounts
Create a new account in Office 365 (or pick an existing one), then create the corresponding AD account, too.
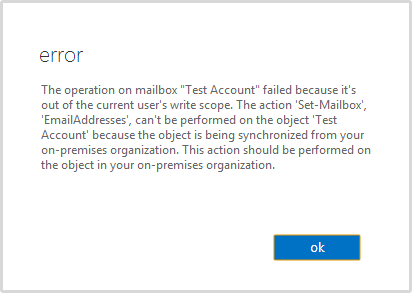
Force the sync again and you’ll be presented with an AttributeValueMustBeUnique error.
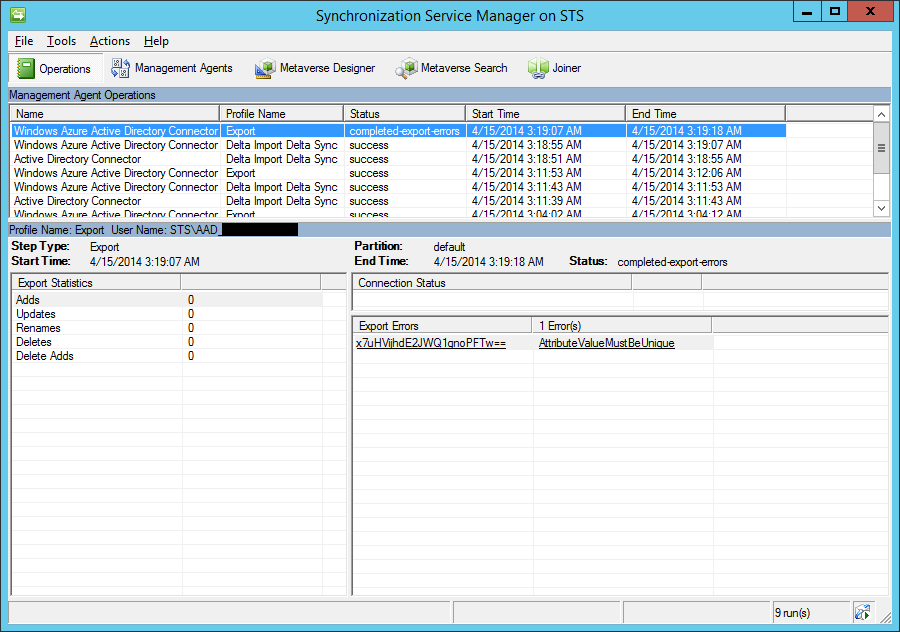
Click on it, then it shows you a little bit more info.
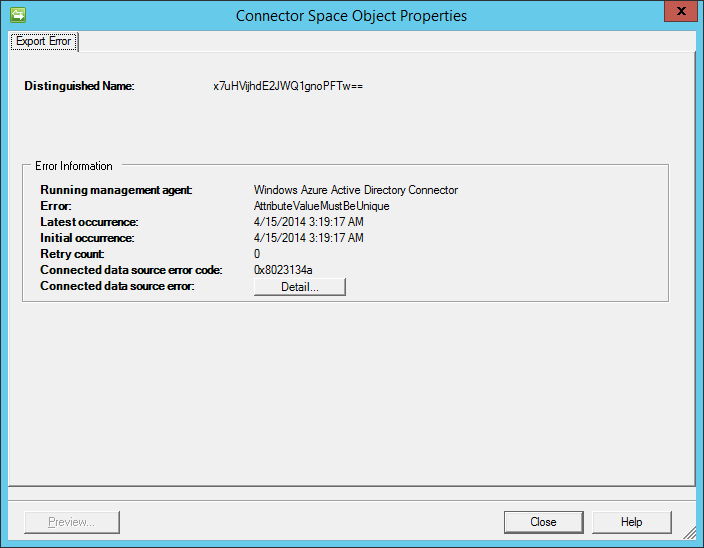
Click on Details…, and it finally tells you the exact error.
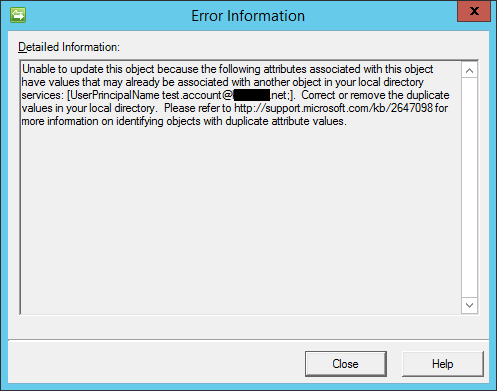
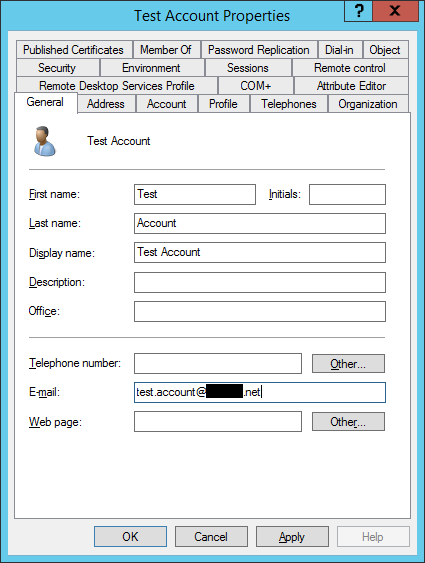
And why’s that? Because the local and cloud objects don’t know they belong to each other. You need to perform a procedure called SMTP matching which means you need to set the AD object’s mail attribute to be the same as the Office 365 user’s primary email address.
Now that’s almost good. If you’ve just created this new account in Office 365, you may forgot to assign a license to it. In which case, the AttributeValueMustBeUnique error would still show up. Why? Because the Office 365 user doesn’t have an email address yet. So assign a license that includes Exchange Online, make sure that the email address is the same as the AD user’s mail attribute, wait a few minutes, perform the sync again, then, at last, the Office 365 cloud account suddenly becomes an AD synced account.

The Office 365 account only needs an Exchange license until this initial linkage is done, later they’ll remain linked even if you revoke the license. If you’re curious why, make sure to check out section 5.2, too.
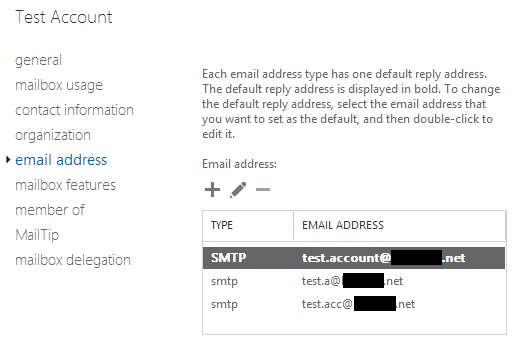
Accounts with several email addresses
It’s pretty obvious that you can’t specify multiple email addresses for the email address. You don’t need to worry though, the mail attribute is only for the primary email address. Let’s add the rest now.
If you haven’t done so yet, enable Advanced Features in Active Directory Users and Computers.
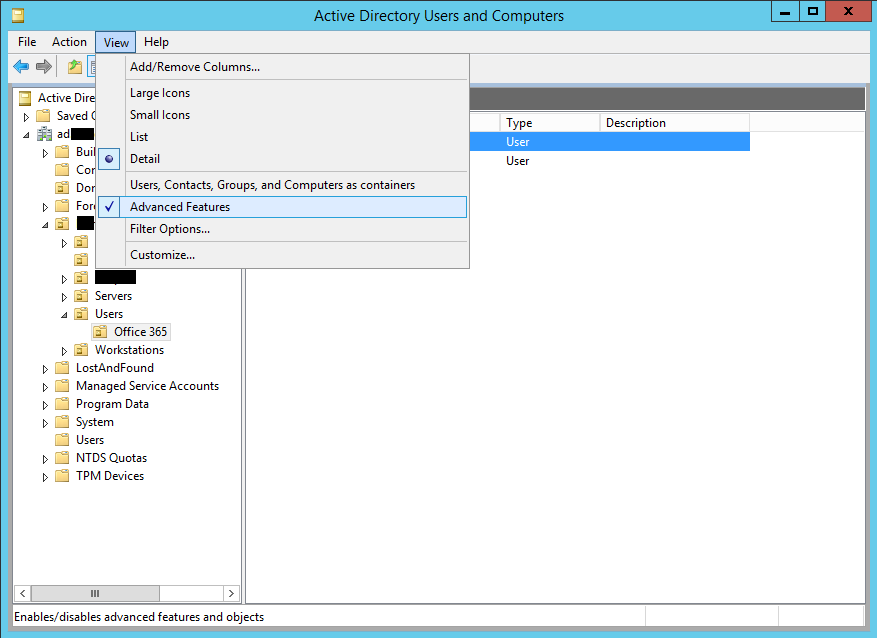
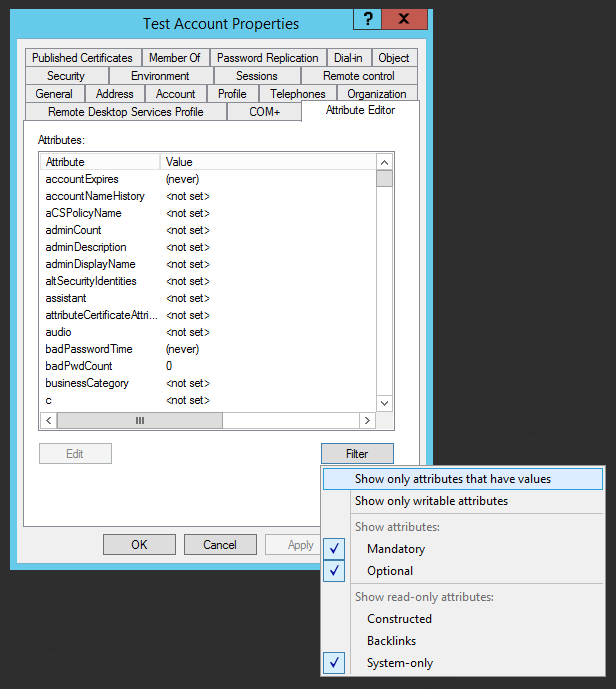
Now open account properties, go to the Attribute Editor tab and find the proxyAddresses attribute. If you can’t see it, disable filtering.
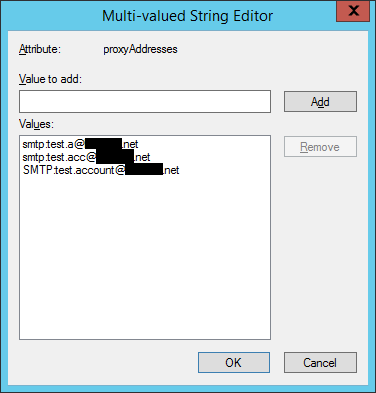
The following rule applies to proxyAddresses: you specify the primary email address with SMTP:[email protected] and any alias with smtp:[email protected]. What’s the difference? The first one’s uppercase while all the others are lowercase. It’s that simple.
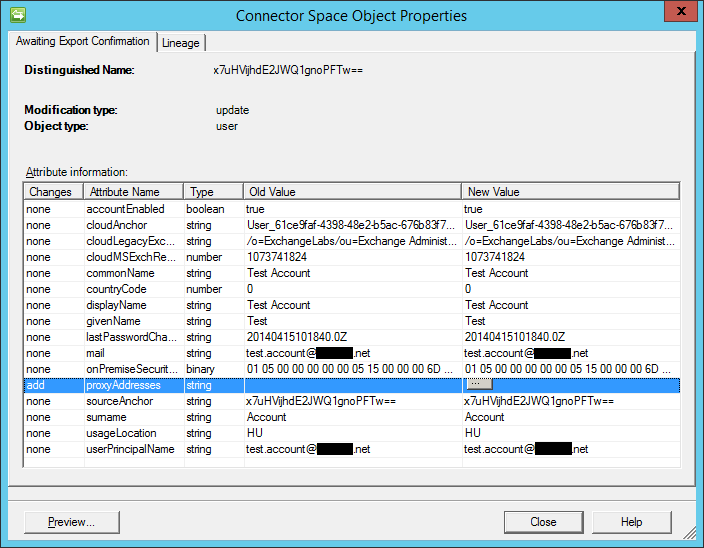
Force the sync again and it tells you there’s an update. If you go to details, you can actually check out what has changed, and suprise, it’s the proxyAddresses attribute.
If you wait a few minutes and go to the Exchange management portal, you can verify that the new aliases have been added to the account.
Now you’re probably wondering, what happens if you modify something on the Microsoft Portal. Will there be an inconsistent state? Just don’t worry, there won’t be 🙂
Schedule
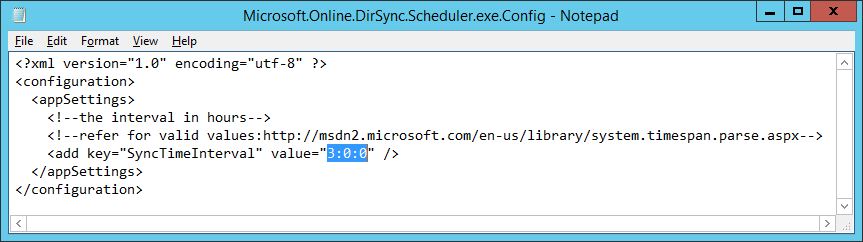
Until now, you always forced the sync manually. The good news is that STS will perform the sync regularly. The default interval is 3 hours between scheduled syncs but you can change it if you want.
Open %PROGRAMFILES%\Windows Azure Active Directory Sync\Microsoft.Online.DirSync.Scheduler.exe.Config and change the SyncTimeInterval property accordingly.
Migrating Office 365 accounts to a new AD Domain
In this scenario you have already synced AD accounts from a certain domain, but now you want to migrate these users to a different AD environment. This one’s a bit tricky, but sure as hell is possible.
Unlinking Office 365 Users from the old Domain
This is very simple. Go to the Office 365 Admin Center, click Users and Groups, find Active Directory® synchronization and click Deactivate. Be warned, this will take up to 3 days. It’s not just a disclaimer, it really takes a long time.
Linking Office 365 Users to the new Domain
Once the deactivation finishes, make sure the old STS is not running anymore, then re-activate it. Set up the new STS server, connect it to your new DCs and set up SMTP matching so that every property matches. And then? You get the familiar AttributeValueMustBeUnique error. Why? Because the first time an Office 365 account is linked to an AD account it gets its ImmutableId attribute filled with the hash of the AD account. In fact, the SMTP matching article explicitly says that at this point, you’re screwed.
SMTP matching can be used only one time for user accounts that were originally authored by using Office 365 management tools. After that, the Office 365 user account is bound to the on-premises user by an immutable identity value instead of a primary SMTP address.
Guess what, it’s not true. Err, not completely true. It’s true that after SMTP matching they’ll be linked via an immutable identity value, but it’s definitely not true that you could only do this once. And I only figured this thanks to this helpful guy. Remember when we synced test.user? Under Adds it showed us some Distinguished Name. See, that’s the ImmutableId attribute of the corresponding Office 365 account.
How can you verify this? Install the Windows PowerShell cmdlets for Office 365 management and deployment. Once done, you’ll have a new entry in the Start Menu/Screen called Windows Azure Active Directory Module for Windows PowerShell. Just rolls off your tongue. So anyway, once it’s running, you can check the immutable ID of any Office 365 user. First connect to your Office 365 organization:
Connect-MsolServiceEnter the credentials of an Office 365 admin, and then it’s fine. Now you can query immutable IDs with the following command:
Get-MsolUser -UserPrincipalName [email protected] | select ImmutableIdIt will respond with something like this:
ImmutableId
-----------
uU8DXb/0MUaZpOwRCDLv4Q==
See? That’s the hash SSM was also displaying when syncing test.user. So this hash is the exact reason why you can’t link your previously linked but currently unlinked Office 365 accounts to the new AD domain yet. All you have to do is set this attribute to null.
Set-MsolUser -ImmutableId "$null" -UserPrincipalName [email protected]You can verify the action with Get-MsolUser, it will return nothing now. At this point you’re all set, you can link your users just like you did previously. Set up the attributes (email addresses, phone numbers, etc.), clear the ImmutableId attribute and sync. The first time you do this for an account, there will be a duplicate-anchor error.

But relax, perform the sync again and it will succeed. If you’re curious enough, you can check the immutable ID after this sync, too, it will be – of course – different.
Troubleshooting
Your best friend is restart. For example, I’ve been debugging password sync for hours, and guess what, I then restarted the STS server as a last resort, and suddenly it started to work.
Anyway, in case you need a bit more than blindly restarting all the time, use Event Viewer. Go to Windows Logs / Application, click on Create Custom View… on the right, under Event sources select the
- Directory Synchronization
- MSOnlineSyncScheduler
events, specify a name, and that’s it. Now if you wonder what those IDs mean, check out KB2855271 as a start. Happy debugging!
