Table of Contents
Preamble
If you have a rather large corporate environment and you want to authenticate your users when connecting to Wi-Fi in a way that’s a little bit more sophisticated than a pre-shared key, you’ll probably end up using RADIUS (Remote Authentication Dial In User Service). When it comes to RADIUS, FreeRADIUS is the most common choice and when it comes to directory services (for maintaining user credentials), the most common choice is Active Directory.
What you’re about to achieve can fail very easily and that’s because the process consist of many-many layers and if a single one is just halfway broken all the others will fail, too. So you just can’t take shortcuts. Take your time, read the guide all through, most preferably start from scratch in a test environment before modifying an existing system (to see how it’s supposed to work in a clean setup), and never proceed before the previous pieces are working perfectly.
This tutorial will guide you through the process of setting up a FreeRADIUS server that authenticates Active Directory users who connect from Windows and Ubuntu clients over Wi-Fi. It is tested with Windows Server 2008 R2 and 2012 (as AD servers), Ubuntu Server 12.04 LTS and 12.10 for FreeRADIUS, and a TP-Link TL-WA701ND as the wireless access point (but it’s also tested with a Cisco WLC). Obviously I won’t explain how to create a domain, how to install Ubuntu etc. Do your homework on that. Other than that, this guide is intended to be comprehensive, from beginning to end, unlike the other few tutorials I could find during the setup of our system.
Active Directory
Like I said before, you can safely use either 2008 R2 or 2012, both should work just fine. In fact, it should work with 2003, too, I just didn’t test it.
In this scenario, I’ll use the radius.local domain, with the domain controller in use called dc (that is, dc.radius.local). You’ll need a domain user for testing your changes; I’ll use the raduser name with a password being set to P@ssw0rd.
That’s about it, all you need on the AD part is a working domain controller and a domain user.
FreeRADIUS
In this example I’ll use Ubuntu Server because it’s mainstream; both 12.04 and 12.10 should do. You’ll probably have to slightly modify your configuration on other distros, but the basic principle is the same. In case you’re stuck, you can just grab the Ubuntu packages from their website and use their config files on your distro. All commands shown below should be ran with root privileges, so sudo -i is your friend.
Joining the domain
The first thing to do is join the Ubuntu server to the radius.local domain. Let’s begin with making the domain controller (dc) the DNS server for this Ubuntu server. The simplest option is to make a DHCP reservation on the DC and make Ubuntu acquire its network settings via DHCP, but you can specify it manually on the Ubuntu side as well.
Now you’ll need the samba-common-bin package, but we’ll also need Winbind which depends on that, so we’ll just install Winbind instead:
apt-get install winbindNow let Samba know what domain it belongs to, open /etc/samba/smb.conf and under the [global] section edit the WORKGROUP property:
WORKGROUP = RADIUSIn case you’re using a subdomain, like sub.radius.local (i.e. your DC is dc.sub.radius.local), you should use SUB here, or if you want cross-domain authentication, enter the parent domain, i.e. RADIUS-LOCAL. In this case you have to use this domain consistently in the following steps. You can list all the available domains with:
wbinfo --all-domainsNow you gotta change the security method to domain, so find the security property in the file (also under [global]) and edit it accordingly:
security = domainThat’s it. Now we’re ready to join. Make sure your Linux server can reach the domain controller (for example, issue the nslookup dc command, it should point you to your domain controller), then:
net join -U AdministratorWhere Administrator is the built-in AD account, but you can use any Domain Admin account if you want. You should get a
Joined domain RADIUS.
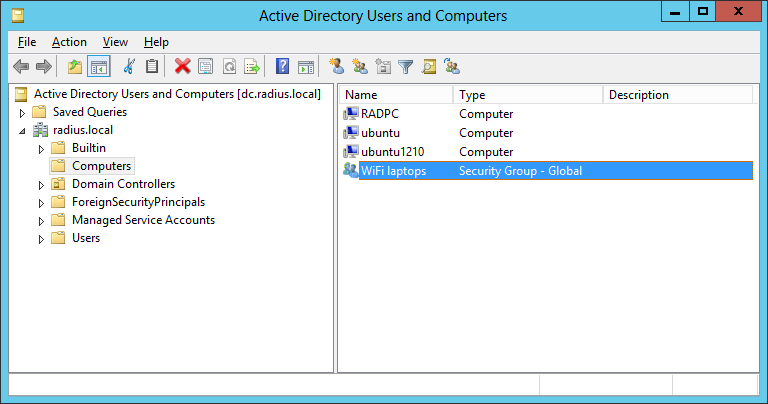
message. Upon success, a new computer object will be created in AD:

Now make sure everything’s working fine with the wbinfo utility:
wbinfo -a raduser%P@ssw0rdThis does nothing else but tries to authenticate in AD. Upon success, you’ll get a
plaintext password authentication failed
Could not authenticate user raduser%P@ssw0rd with plaintext password
challenge/response password authentication succeeded
message. In case you get a
WBC_ERR_WINBIND_NOT_AVAILABLE
error, just start winbindd manually. When these are working fine, proceed to the next section.
NTLM authentication
Samba uses the ntlm_auth utility for authentication, which in fact relies on Winbind. Verify that it works with the following command:
ntlm_auth -request-nt-key -username=raduser -password=P@ssw0rdYou should get a
NT_STATUS_OK: Success (0×0)
message. With this, all the prerequisites of FreeRADIUS are met, so it’s time to
apt-get install freeradiusNow it is essential that FreeRADIUS is able to read the sockets created by Winbind. On Ubuntu, the socket is /var/run/samba/winbindd_privileged, owned by root:winbindd_priv (i.e. root user, winbindd_priv group). So you’ll simply add the freerad user (which runs the freeradius daemon) to this group:
usermod -a -G winbindd_priv freeradNow you want to test if FreeRADIUS can authenticate via ntlm_auth, but you need to fix things here and there first. Open /etc/freeradius/modules/ntlm_auth which has the following line:
program = "/path/to/ntlm_auth -request-nt-key -domain=MYDOMAIN -username=%{mschap:User-Name} -password=%{User-Password}"You gotta fix the path and remove the domain part, because Samba already knows the domain to use, so you can avoid hardcoding the same thing twice:
program = "/usr/bin/ntlm_auth -request-nt-key -username=%{mschap:User-Name} -password=%{User-Password}"At this point ntlm_auth would work, but FreeRADIUS doesn’t know yet how to use it, because it’s not a real authentication method by itself. So you’re gonna define it as an authentication method (which can be removed later). Open the /etc/freeradius/sites-enabled/default and /etc/freeradius/sites-enabled/inner-tunnel files. They are quite similar for the most part. Under the authenticate sections create a new definition as follows:
Auth-Type NTLM {
        ntlm_auth
}
This defines the NTLM authentication type (could be called any way you want) which simply calls ntlm_auth. In theory you could place these anywhere inside the authenticate sections; I put them after the definition of MS-CHAP. Now FreeRADIUS does know how to use ntlm_auth, but since it’s not an actually existing request type you gotta tell it to treat any request as such. Open /etc/freeradius/users and add this to the very beginning:
DEFAULT Auth-Type = NTLMThis is exactly what it looks like, it tells FreeRADIUS to use the previously defined NTLM authentication method for all requests. This is the moment when you can finally send a test request to the FreeRADIUS daemon. While you’re testing, it’s highly recommended to run freeradius in the foreground to see its output. So stop the daemon, which starts automatically after installation:
service freeradius stopThen run it in the foreground from a separate terminal:
freeradius -XOpen a separate terminal and send a test requests via the radtest utility:
radtest raduser P@ssw0rd localhost 0 testing123This means that you try to authenticate with the raduser user and P@ssw0rd password, the server runs on the localhost, you use NAS (Network Access Server) port 0 (not to be confused with TCP port) and testing123 is the default shared secret for this client (you can change it in the FreeRADIUS config files). According to the radtest manpage, you could use any number for NAS port between 0 and 2^31. Yeah, it makes a whole lot of sense. Upon success, you should see the
Sending Access-Request of id 153 to 127.0.0.1 port 1812
User-Name = “raduser”
User-Password = “P@ssw0rd”
NAS-IP-Address = 127.0.1.1
NAS-Port = 0
rad_recv: Access-Accept packet from host 127.0.0.1 port 1812, id=153, length=20
message. After that, you can proceed.
MS-CHAP
Like I said, ntlm_auth is not useful by itself, because it will be used via MS-CHAP, not directly. So first of all, remove that
DEFAULT Auth-Type = NTLMline from /etc/freeradius/users.
Now you need to fix the MS-CHAP module. Open /etc/freeradius/modules/mschap and once again, fix the ntlm_auth path in the program attribute (replace /path/to/ntlm_auth with /usr/bin/ntlm_auth). Fortunately this file does not contain the -domain directive like the other one, so you don’t have to remove it once again. Additionally, enable the with_ntdomain_hack directive:
with_ntdomain_hack = yesRestart the freeradius instance running in the foreground (Ctrl + C, then freeradius -X again) so that it can reload its config, then send an MS-CHAP request from the other terminal:
radtest -t mschap raduser P@ssw0rd localhost 0 testing123You should get a
Sending Access-Request of id 67 to 127.0.0.1 port 1812
User-Name = “raduser”
NAS-IP-Address = 127.0.1.1
NAS-Port = 0
MS-CHAP-Challenge = 0x841315b113a2a0db
MS-CHAP-Response = 0x0001000000000000000000000000000000000000000000000000babe95a0e1074ea74ac3dd1305da5b3b96ea8489a7b5e770
rad_recv: Access-Accept packet from host 127.0.0.1 port 1812, id=67, length=84
MS-CHAP-MPPE-Keys = 0x0000000000000000707e3d831d26f7f16aa52367c578b8730000000000000000
MS-MPPE-Encryption-Policy = 0×00000001
MS-MPPE-Encryption-Types = 0×00000006
message. If it succeeded, you can proceed.
EAP-MSCHAP
Windows clients support the EAP-MSCHAP authentication method, version 2, that is, MS-CHAP encapsulated in EAP. So now you still gotta configure EAP, but fortunately it won’t take too long. Open the /etc/freeradius/eap.conf file and find the default_eap_type line in the eap section, and set it to peap:
default_eap_type = peapIf you track it down, peap in turn is set to use mschapv2 by default, so normally you don’t have to touch it:
default_eap_type = mschapv2If you go even further, you can see that mschapv2 does not require further configuration, but it requires mschap to be working correctly, which you’ve already done in the previous step. At this point you probably start to realize how much these components depend on each other, that’s why you always gotta make sure a component works well before proceeding to the next one.
RADIUS client
The RADIUS client will be the controller to which Wi-Fi clients will connect via access points. In my case that is a TP-Link TL-WA701ND access point, but it can be many things. The point is, you gotta specify this client in the FreeRADIUS config. Open /etc/freeradius/clients.conf and define a client. Example:
client 192.168.0.3 {
        secret = my_secret
        shortname = my_short_name
        nastype = cisco
}
For a list of NAS types, refer to the clients.conf manpage. It’s quite possible that you don’t need to define it because FreeRADIUS may be able to figure it out on its own. For example, it works without nastype with my TP-Link AP, but for the Cisco WLC I defined it just to make sure.
Access point
Now you gotta set up the previously defined client via its web interface. At minimum, you need to specify the IP address of the Ubuntu RADIUS server, the server port (1812 by default) and the secret.
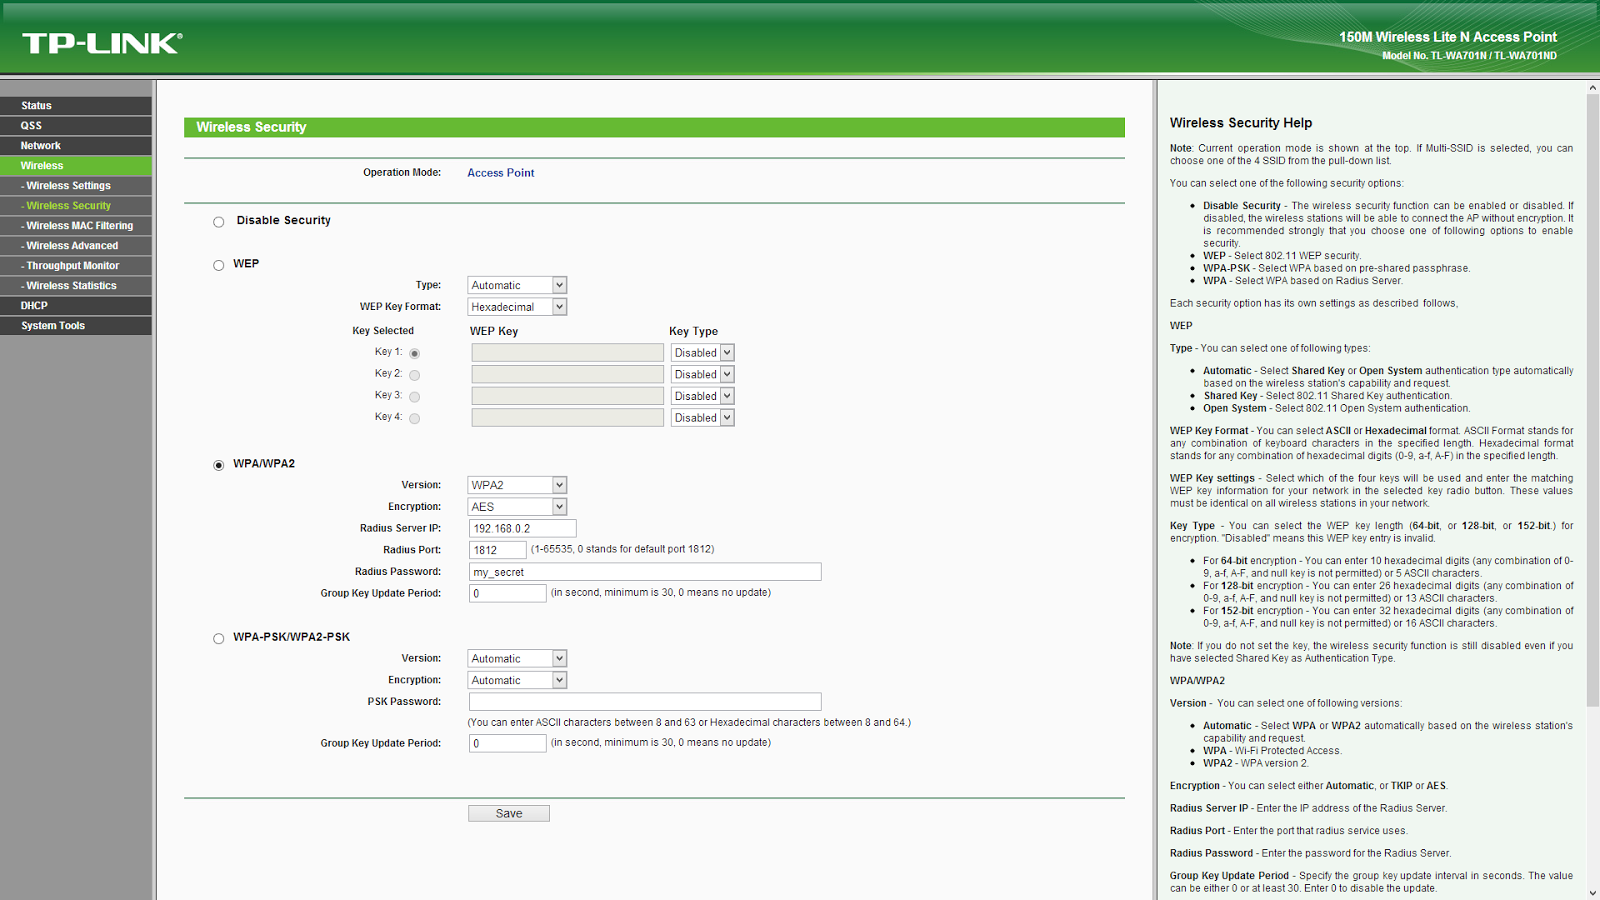
This part varies from device to device, but it should be quite straightforward.
Windows Wi-Fi clients
There are at least 2 ways of configuring Windows clients for FreeRADIUS access; the simpler one is manual configuration on the client on demand, the more complex but also more robust method is deployment via Group Policy.
Manual configuration
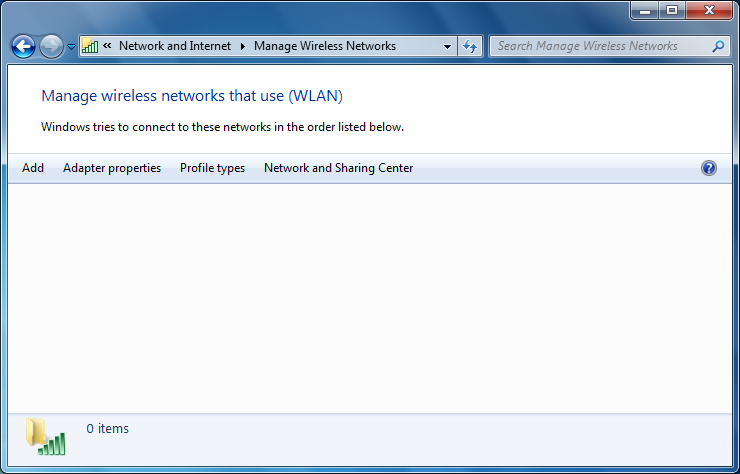
I’ll cover Windows 7; XP, Vista and 8 should be fairly similar. Go to Network and Sharing Center, then Manage wireless networks, then click Add.
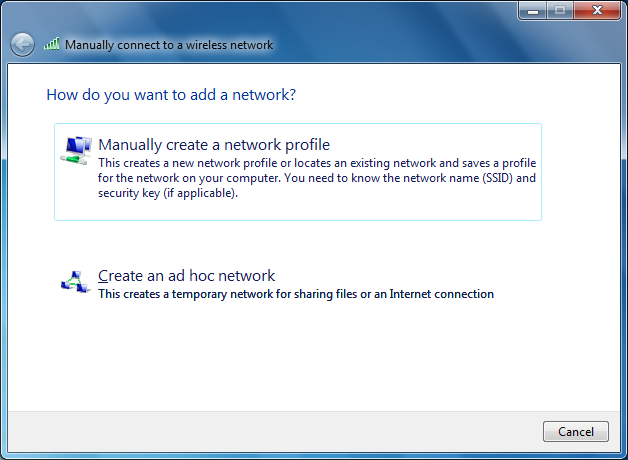
Select Manually create a network profile.
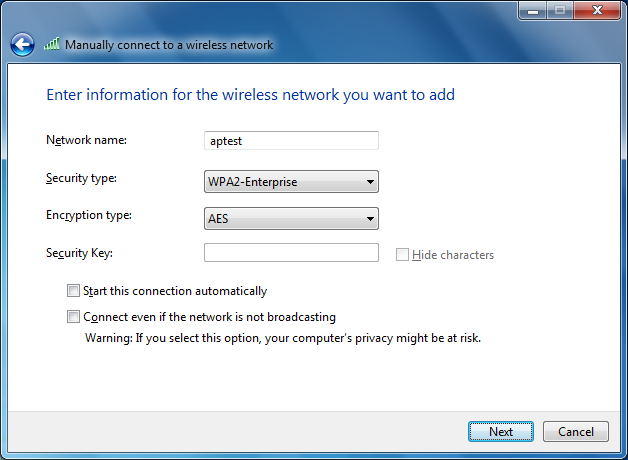
Enter the SSID of your AP (for me it’s aptest), select WPA2-Enterprise as security type. You might want to uncheck the box, Start this connection automatically. Then click Next.
Now click on Change connection settings.

Go to the Security tab, and under Choose a network authentication method, make sure that Microsoft: Protected EAP (PEAP) is selected.
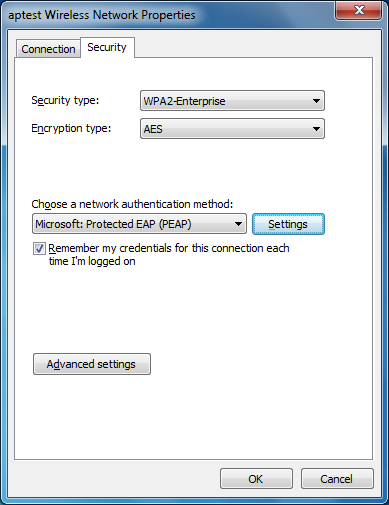
Then next to this, click on Settings. Uncheck the box, Validate server certificate.
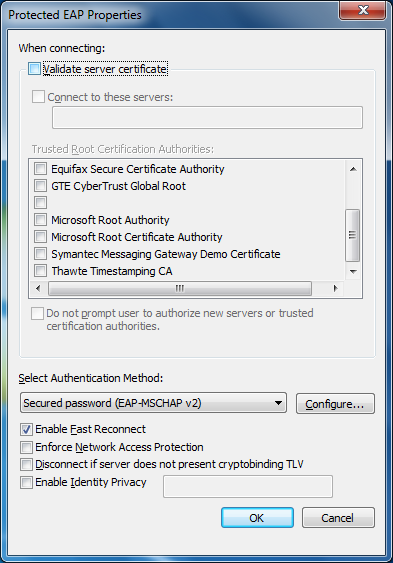
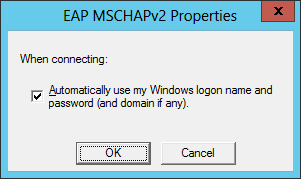
If you want Windows to always ask their users for logon credentials upon connecting to Wi-Fi, go to Configure… and uncheck Automatically use my Windows logon name and password (and domain if any).

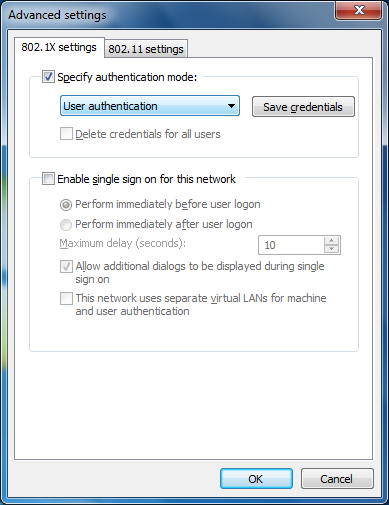
Press OK, then go to Advanced settings and check Specify authentication mode. Select User authentication.
If you get the following error while connecting:
[peap] processing EAP-TLS
TLS Length 7
[peap] Length Included
[peap] eaptls_verify returned 11
[peap]
Then you may have to log in as a Domain Admin first; it should also be working with users later on. Also make sure that the workstation you’re using is actually joined to the domain and you’re actually logged in with a domain account (i.e. not a local one), otherwise the authentication may fail under certain circumstances.
Deployment via Group Policy
In fact, this method is almost as easy, given you’re at least somewhat familiar with Group Policy. Basically you’ll do the same as on a workstation.
First, go to Active Directory Users and Computers and create a Global Security Group for the workstations this policy will be applied to. In this example, I’ll use the WiFi laptops name.
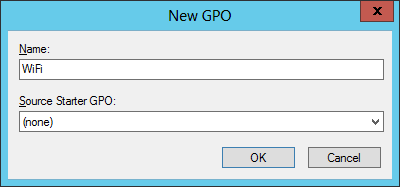
Then go to Group Policy Management and create a new Group Policy Object.
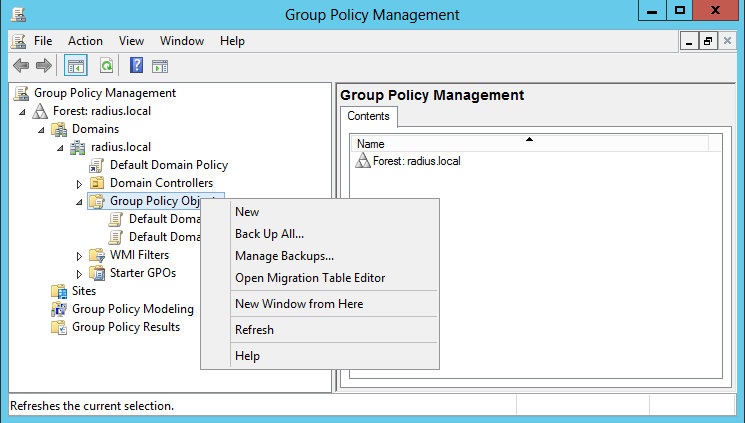
Let’s name it WiFi.
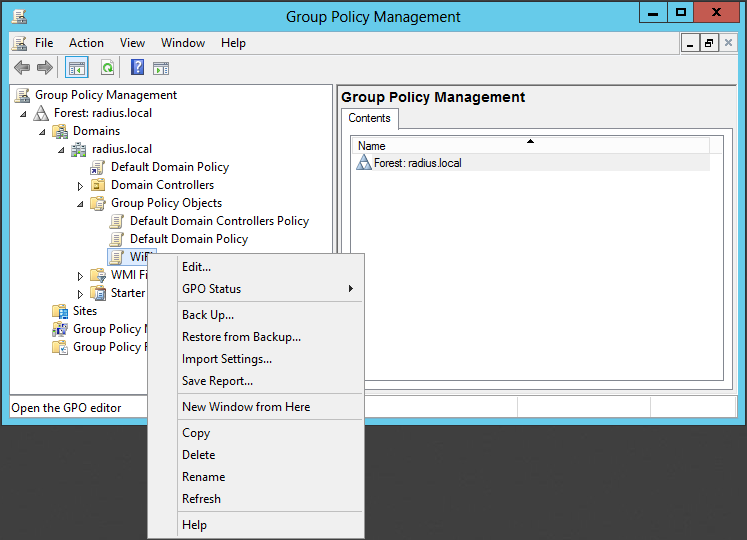
Now select this newly created GPO and Edit it.
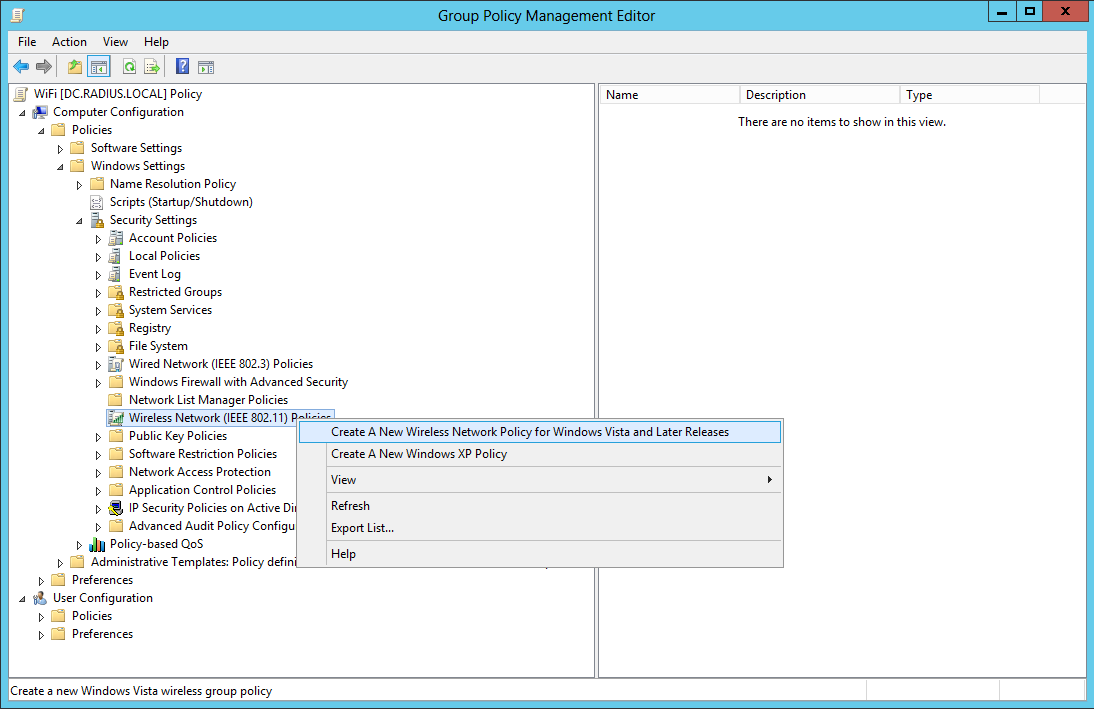
Go to Computer Configuration / Policies / Windows Settings / Security Settings / Wireless Network (IEEE 802.11) Policies, right click and select Create A New Wireless Policy for Windows Vista and Later Releases.
On the General tab give your policy a name (WiFi), then click on Add / Infrastructure.
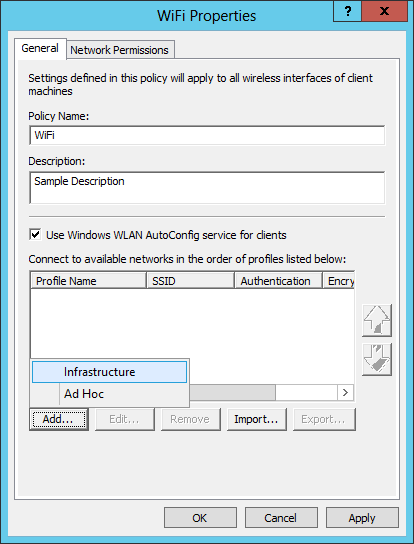
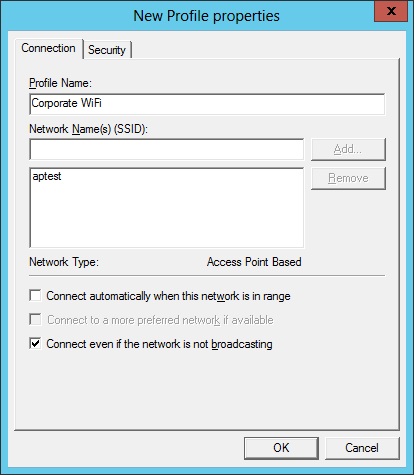
Provide a Profile Name. This will be the name that your users will see on their workstations in the wireless network list. Also specify the Network Name (SSID), then click on Add…
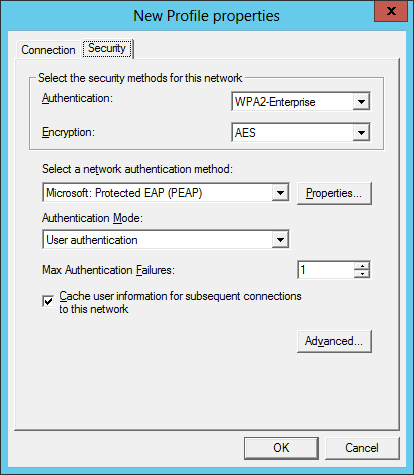
Now go to the Security tab and select User Authentication as Authentication Mode.
Then click on Properties… and uncheck Verify the server’s identity by validating the certificate.
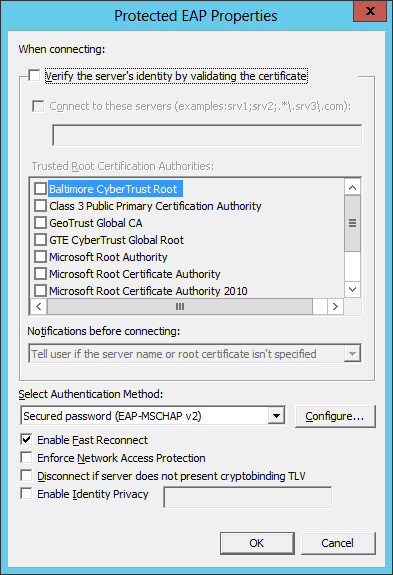
Under Configure…, you can choose to use logon credentials or not.
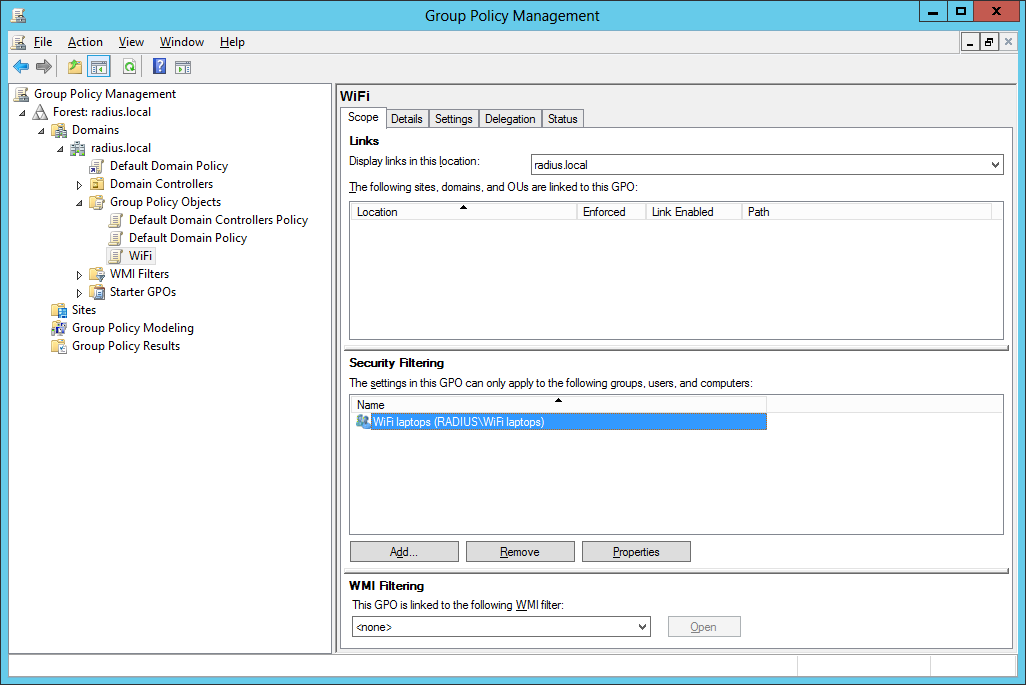
Save your settings. Now go back to Group Policy Management and modify the Security Filtering for this GPO, i.e. which computers will this policy be applied to. Remove the default Authenticated Users entry and add your newly created WiFi laptops group.
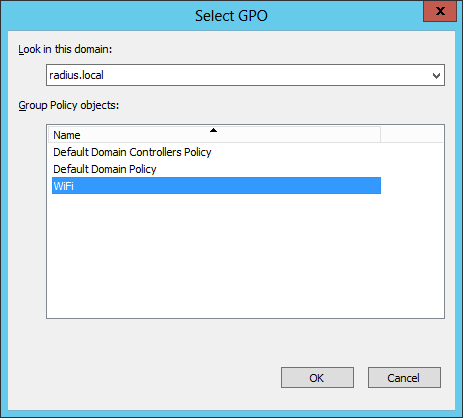
Now the filtering is fine but you still need to link this GPO to a domain, site or OU. So right click on the desired item and select Link an Existing GPO… For simplicity’s sake I’ll link it to my root domain.

Select this new WiFi GPO and press OK.
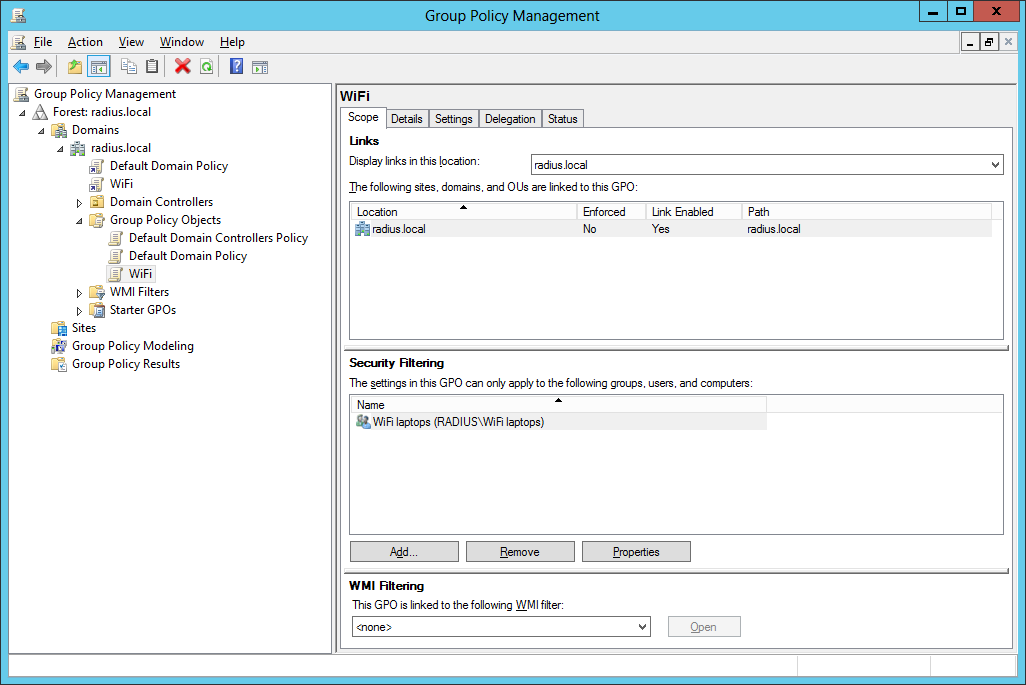
Now the links appear both under the selected item and in the Links section of the WiFi GPO.
That’s it. Now you can add the desired workstations to the WiFi laptops group, run gpupdate /target:computer (or if it still doesn’t work, gpupdate /force), maybe reboot just to make sure, and the specified network will become available on these workstations.

Ubuntu Wi-Fi clients
Click on the network manager applet and go to Edit Connections… (or run the nm-connection-editor command). Go to Wireless.
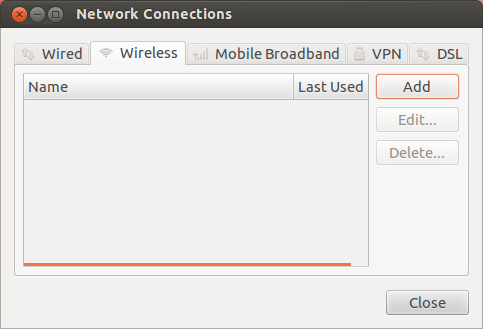
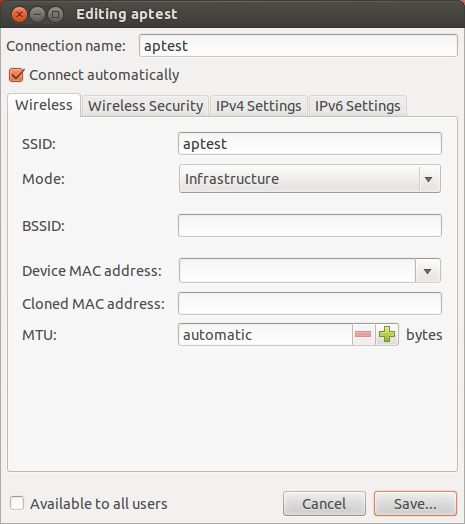
Click on Add. On the Wireless tab specify Connection name and SSID, then make sure Mode is set to Infrastructure.
Go to the Wireless Security tab and set Security to WPA & WPA2 Enterprise, Authentication to Protected EAP (PEAP), and make sure Inner authentication is MSCHAPv2. Specify your Username in the form of DOMAIN\username, i.e. RADIUS\raduser and also specify your Password if you don’t want to enter it each time you connect. It’s probably a good idea to uncheck the box, Available to all users.
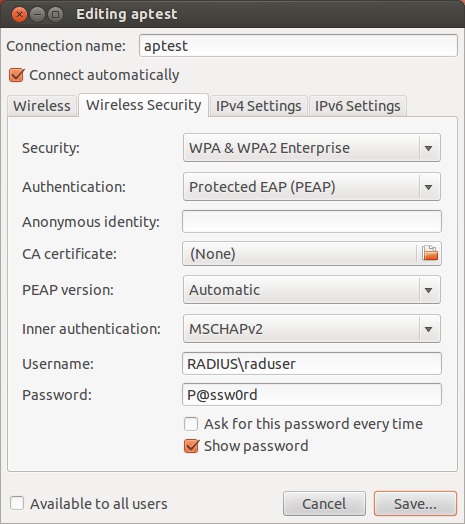
You’ll get a notification about missing certificates, but you can safely ignore it.

Restricting Access
You may not want to allow everyone in your forest to connect to the Wi-Fi network you’ve just set up. Remember those two files where you had to fix the ntlm_auth path? All you have to do is extend the string with the -require-membership-of=RADIUS\WirelessUsers directive, restart FreeRADIUS and then only members of the RADIUS\WirelessUsers group will be able to authenticate.
Final words
At this point the integration of your FreeRADIUS server with your Active Directory forest should be working fine. Bear in mind though, there are some limitations.
For example, a given user can only connect from a single device at a time, because sessions are attached to devices. So when your users are switching devices (e.g. moving from a workstation to a laptop) they’ll have to wait for a certain amount of time (something like 5-10 minutes) before FreeRADIUS will allow them to authenticate from the new device (given they are disconnected from the previous device). This means that if a certain person wants to connect from multiple devices simultaneously, you have to create multiple AD accounts for her.
Also, unless you manage to join your Ubuntu (or other Linux) workstations to Active Directory and make NetworkManager somehow integrate with those credentials, Ubuntu users will have to update their Wi-Fi passwords in NetworkManager when they change their AD passwords, because, unlike on Windows, they don’t use their logon credentials for Wi-Fi authentication. This also implies that if several users use the same Ubuntu workstation, you gotta make sure you don’t make the added Wi-Fi network available to all users but set it up for each user separately, otherwise all users will use a certain one’s credentials, which is a possible security threat.
Finally, I didn’t take care of certificates, mostly because we don’t need such a great deal of security. In case you need it, you’ll have to do some additional research first.
Even with these shortcomings, FreeRADIUS integrated with Active Directory is a very nice way of providing your users with secure Wi-Fi access to your internal network.