Update: Blizzard confirmed that they’ll get rid of this feature. This guide is still useful if you need a WireGuard server, but it’s not applicable to Diablo II: Resurrected anymore. Thanks for the tip, Jo-Erlend!
Table of Contents
Foreword
The younger ones probably can’t even imagine life without internet, but back in the day, most of us didn’t have it. And thus LAN parties were born. And that’s why Diablo 2, released in 2000, also has it, dubbed TCP/IP. And apparently Diablo 2: Resurrected will also have it. Isn’t that just awesome?
Anyway, times have changed, we grew up, often moved to different cities, and internet became widespread. But our love for Diablo 2 remained. And that’s when Hamachi and the likes came into picture. In essence, Hamachi creates a virtual network between you and your friends, so that you can play games as if you were in the same room at a LAN party. Hence the term, Virtual Private Network, or VPN for short.
In this guide I’ll show you how to set up your own dedicated VPN server, so that you can play Diablo 2: Resurrected with your friends via TCP/IP.
Vultr
For TCP/IP to work, you need a server in the cloud, a.k.a. VPS (virtual private server). For that server you need a hosting provider. Now, there are many great VPS providers, but the one that I use and can wholeheartedly recommend is Vultr. If you want to sign up, please consider using my affiliate link, you earn some credits, and so do I. We both benefit!

Once signed up, deploy a new server instance in your preferred server location. Server type should be the latest version of Fedora. For server size, pick any size you want, but for most cases, the smallest $5 one should be plenty.
Using SSH keys is a wise idea, but you can use just passwords too, if you really want. If in doubt, please read Using SSH Key Pairs on Windows.
Once you hit Deploy Now, give Vultr a minute or two to fire up your VPS. Once done, it’ll let you know via email. You can also check on your VPS via the View Console feature.
First Steps
Alright, your VPS is up and running, but you should do some maintenance first. First of all, make sure to apply all available OS updates:
sudo yum updateDon’t worry if it seems to be stuck at the last step, it just takes a few minutes to complete. Since this command will most likely bring with it a kernel update, reboot the VPS with the fittingly named reboot command.
Cool, the OS is now up-to-date. I don’t know about you, but I don’t like my server being exposed to the web by default, so I recommend disabling the Cockpit service in the firewall:
sudo firewall-cmd --remove-service=cockpit --permanent
sudo firewall-cmd --reload
Now we need a bunch of utils that will help us install and configure the VPN server itself:
sudo yum install git ansible mcAnd that’s it for the preparation!
WireGuard
Installation
WireGuard is a cutting edge, open source, free VPN implementation that works on virtually all operating systems. I’ve written an Ansible role to make the deployment easier. You can check the source code, it’s all open to the public. Anyhow, to install WireGuard, all you have to do is:
git clone https://github.com/noobient/noobuntu.git
cd noobuntu
ansible-playbook ansible/wireguard.yml
At the end of the run, you should get something like this:
PLAY RECAP *******************************************************************************************************
127.0.0.1                  : ok=26   changed=14   unreachable=0    failed=0    skipped=16   rescued=0    ignored=1
The important part is that failed must be 0. So what does this Ansible role do?
- installs all OS updates in case you missed that in the previous part 😉
- enables automatic OS updates so that your VPN server always remains safe and secure
- installs WireGuard itself
- opens port 44444 on the firewall to be used for WireGuard connections
- installs a configuration generator for WireGuard, because configuring WireGuard is PITA OOTB
- deploys a default config for this generator
- generates the necessary WireGuard files for 5 clients
- starts WireGuard
So that’s about it, with just one Ansible command, your WireGuard VPN server should be up and running!
Configuration
So cool, this stuff is all up and running, but what’s this about, where are the config files, etc? Navigate to /etc/wireguard (I recommend mc for this purpose), that’s where all the files reside. Let’s examine wg-gen.conf first, this is the main config file:
wg_endpoint=127.0.0.1
wg_ip=10.10.10.1
wg_port=44444
wg_clients=5
wg_dns=1.1.1.1
One thing you need to fix is wg_endpoint, because the stock 127.0.0.1 is essentially how any computer addresses itself. But you need the public IP address here, the same IP you log in via SSH. The other interesting bit is wg_clients, which is 5 by default, but if you need more clients, just increase the number and that’s it.
Every time you make changes to this wg-gen.conf file, just run wg-gen.sh after, so that the config files are regenerated accordingly.
Use
Cool, the server is up and running. How do you connect to this server now? Just grab the installation package from the WireGuard download page and start the client.
Now you need to assign a client slot to each of your dudes. Go back to your server and navigate to the /etc/wireguard/clients.d folder. There you’ll see a bunch of client files, starting from 2 (why 2, you might ask? because the first peer is the server itself). The relevant part is the .conf files, that is, 2.conf, 3.conf, and so on.
Now copy 2.conf to your own Windows PC, and import it into the WireGuard client. Just hit that Import tunnel(s) from file button, and select 2.conf.
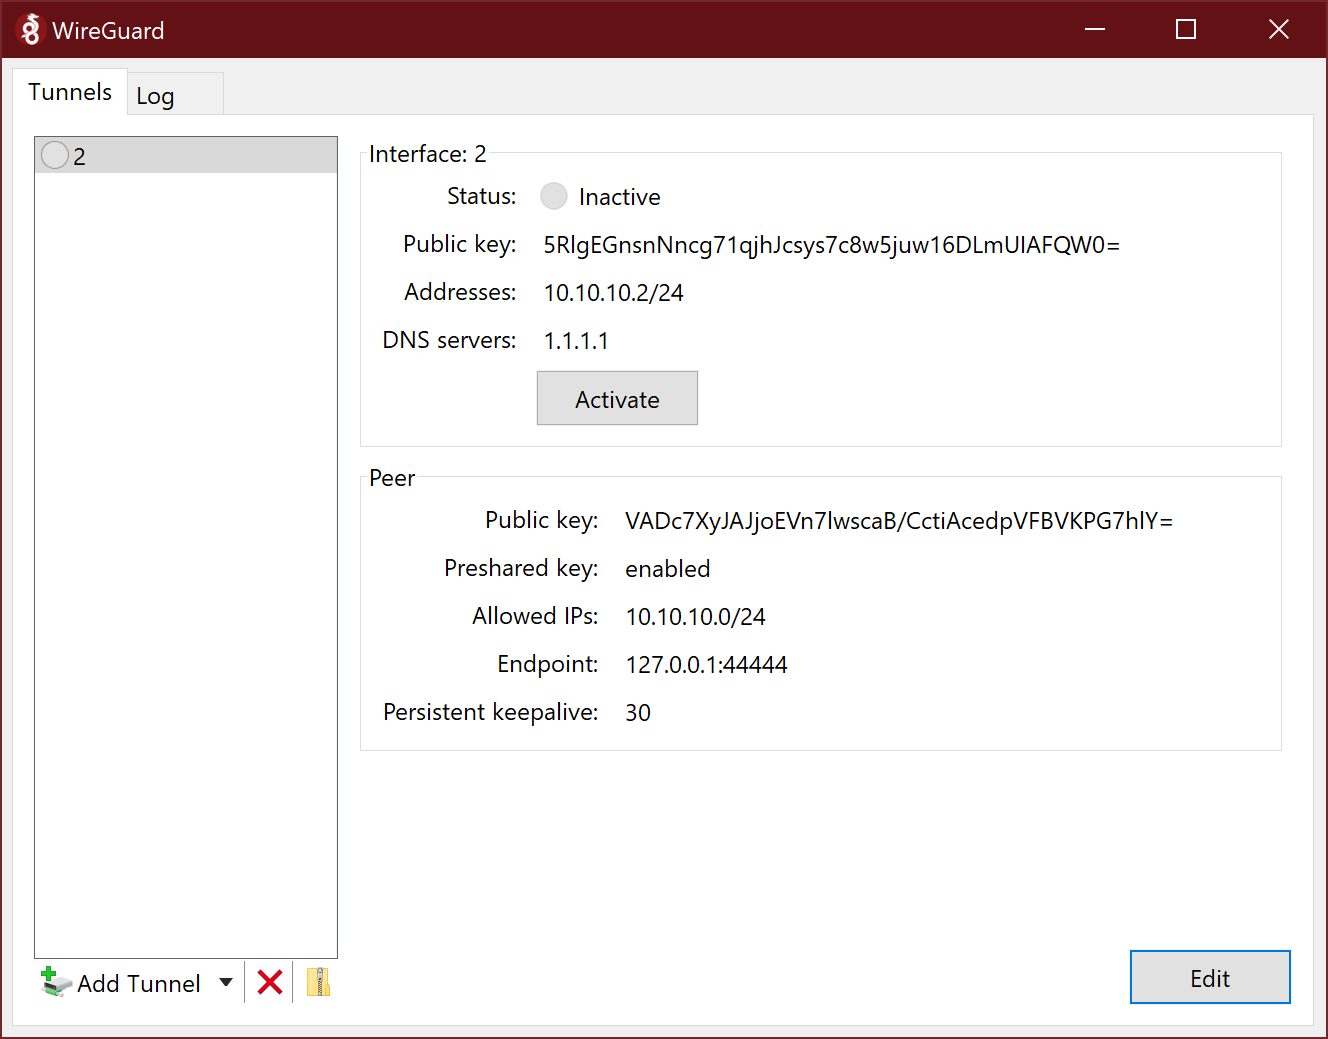
All you have to do now is click Activate:

If you want, you can easily check if the VPN server is reachable, just open a command prompt and try pinging 10.10.10.1, the VPN server’s VPN IP address:

Aaand that’s about it, really. Keep handing out the client config files (3.conf, 4.conf, etc) to your dudes, tell them to import them into WireGuard, activate the connection, and go play! If, for example, the one with 4.conf is hosting the game, others should join to the 10.10.10.4 IP, as shown on the WireGuard main window. It’s really that easy. Now, all that’s missing is my invite link to the Technical Alpha 😉